
The Short Checklist
- Call now for an assessment instead of choosing a completion date from the visible damage.
- Separate water extraction, material drying, moisture checks, and rebuilding when discussing the schedule.
- Ask which wet materials and concealed spaces need continued monitoring.
- Base the next work stage on moisture checks rather than appearance or time elapsed.
- Call now to discuss the water source and affected rooms.
- Ask for a water damage restoration timeline divided into work stages.
- Share any known leaks beneath floors or behind walls.
- Plan around measured drying progress and the repairs required.
Restoration takes as long as the affected materials need to dry and the agreed repairs need to be completed. A fixed number of days can't describe every leak: a wet floor, soaked insulation, and water inside a finished wall create different tasks.
To understand how long water damage repair will take, distinguish drying from rebuilding. Your technician explains the current stage and what must be checked before work proceeds. Water removal is an early milestone; it doesn't mean that the structure is ready for new finishes.
Extraction Starts the Drying Process
- Report standing water and any supply that is still running.
- Keep clear of electrical hazards in flooded rooms.
- Identify affected rugs, carpets, and adjoining floor surfaces during the call.
- Ask which materials need access for drying.
Extraction removes water that can be collected from floors, carpets, and other affected surfaces. The source also needs attention so fresh water doesn't keep entering. If sewage or other contamination is suspected, tell your technician; the cleanup method needs to account for the water involved.
Equipment that collects water doesn't remove every bit of moisture held inside a material. Wet carpet padding or flooring beneath a finished surface may need to be exposed, removed, or dried separately. The water extraction page describes that first service stage.
Materials and Concealed Spaces Affect Drying
- Point out layered floors, thick wood, and enclosed wall cavities.
- Mention damp insulation or water beneath cabinets.
- Leave access openings and drying equipment as your technician directs.
- Report fresh dampness instead of assuming the original leak is resolved.
Dense materials and layered assemblies can hold moisture where room air doesn't readily reach it. Water beneath a floor covering or behind a wall may require access before drying can progress. EPA guidance identifies wall cavities as difficult to dry and explains that wet under-flooring needs attention.
Your technician assesses whether materials can be dried in place or need removal. Swelling, damaged seams, contamination, and access all affect that decision. Removing one wet finish doesn't establish that the material behind it is dry; the exposed area still needs checking.
Humidity and Temperature Change the Drying Conditions
- Follow instructions for doors, windows, and safe room heating.
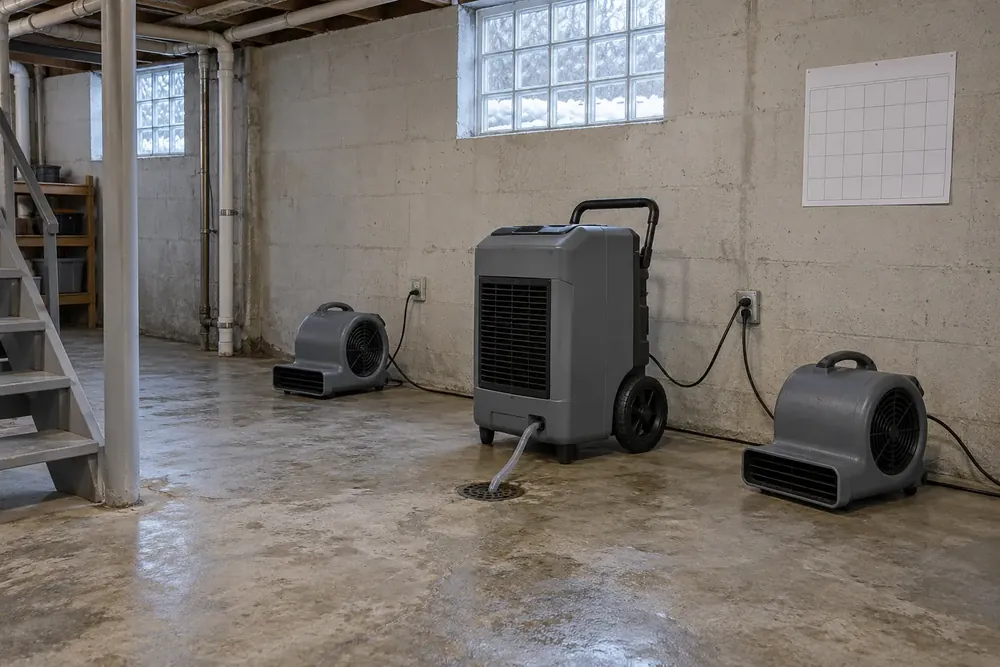
- Keep air mover paths and dehumidifier drains clear.
- Report equipment interruptions or new condensation promptly.
- Ask about changes in the drying plan when room conditions change.
Humid summer air and cold, closed-up houses can make drying harder. Opening windows may bring in more moisture when outdoor air is humid. A cold room can also slow evaporation, while limited air circulation leaves concealed surfaces harder to reach.
Your technician adjusts airflow, humidity control, and safe temperature conditions for the affected space. Don't add a heater or change equipment settings on your own. EPA guidance describes air circulation and temperature as factors in drying; equipment use still depends on the condition of the water and the building.
Moisture Checks Establish Progress
- Ask which walls, floors, and framing are being measured.
- Request an explanation of the readings for each material.
- Keep repeated readings and the written drying record together.
- Wait for material checks before approving replacement finishes.
Drying is judged through material moisture checks and inspection of the affected areas. A surface that feels dry may conceal moisture underneath. Room humidity alone doesn't establish that a floor or wall is ready to cover; your technician needs to evaluate the materials involved.
Ask what drying target applies to each material and whether readings are progressing toward it. A meter reading needs context, including the material and where the measurement was taken. The structural drying service page explains why extraction and moisture monitoring are separate parts of the work.
Rebuilding Follows the Drying Assessment
- Review the drying results before wall cavities are closed.
- Separate retained materials from those listed for replacement.
- Discuss the sequence for drywall, flooring, trim, and paint.
- Keep the repair scope and completion conditions in writing.
Rebuilding begins when the affected materials have been assessed as ready for the planned repairs. Replacing flooring or sealing a wall too early can trap moisture. New surfaces should follow the drying assessment rather than hide damp material left behind.
One of our local water damage partners reviews the planned work and pricing with you before the job starts. Repairs have their own schedule, affected by the materials required and the work sequence. Ask for an updated plan when the scope changes, and keep photos, moisture readings, and written descriptions for insurance documentation.